Function Composition
We can create higher order functions composed of multiple semantic functions using a visual flow editor.
Create New Compositions
To view the list of compositions or create a new composition, click on “Composer” under “Model Execution” in the left side menu.
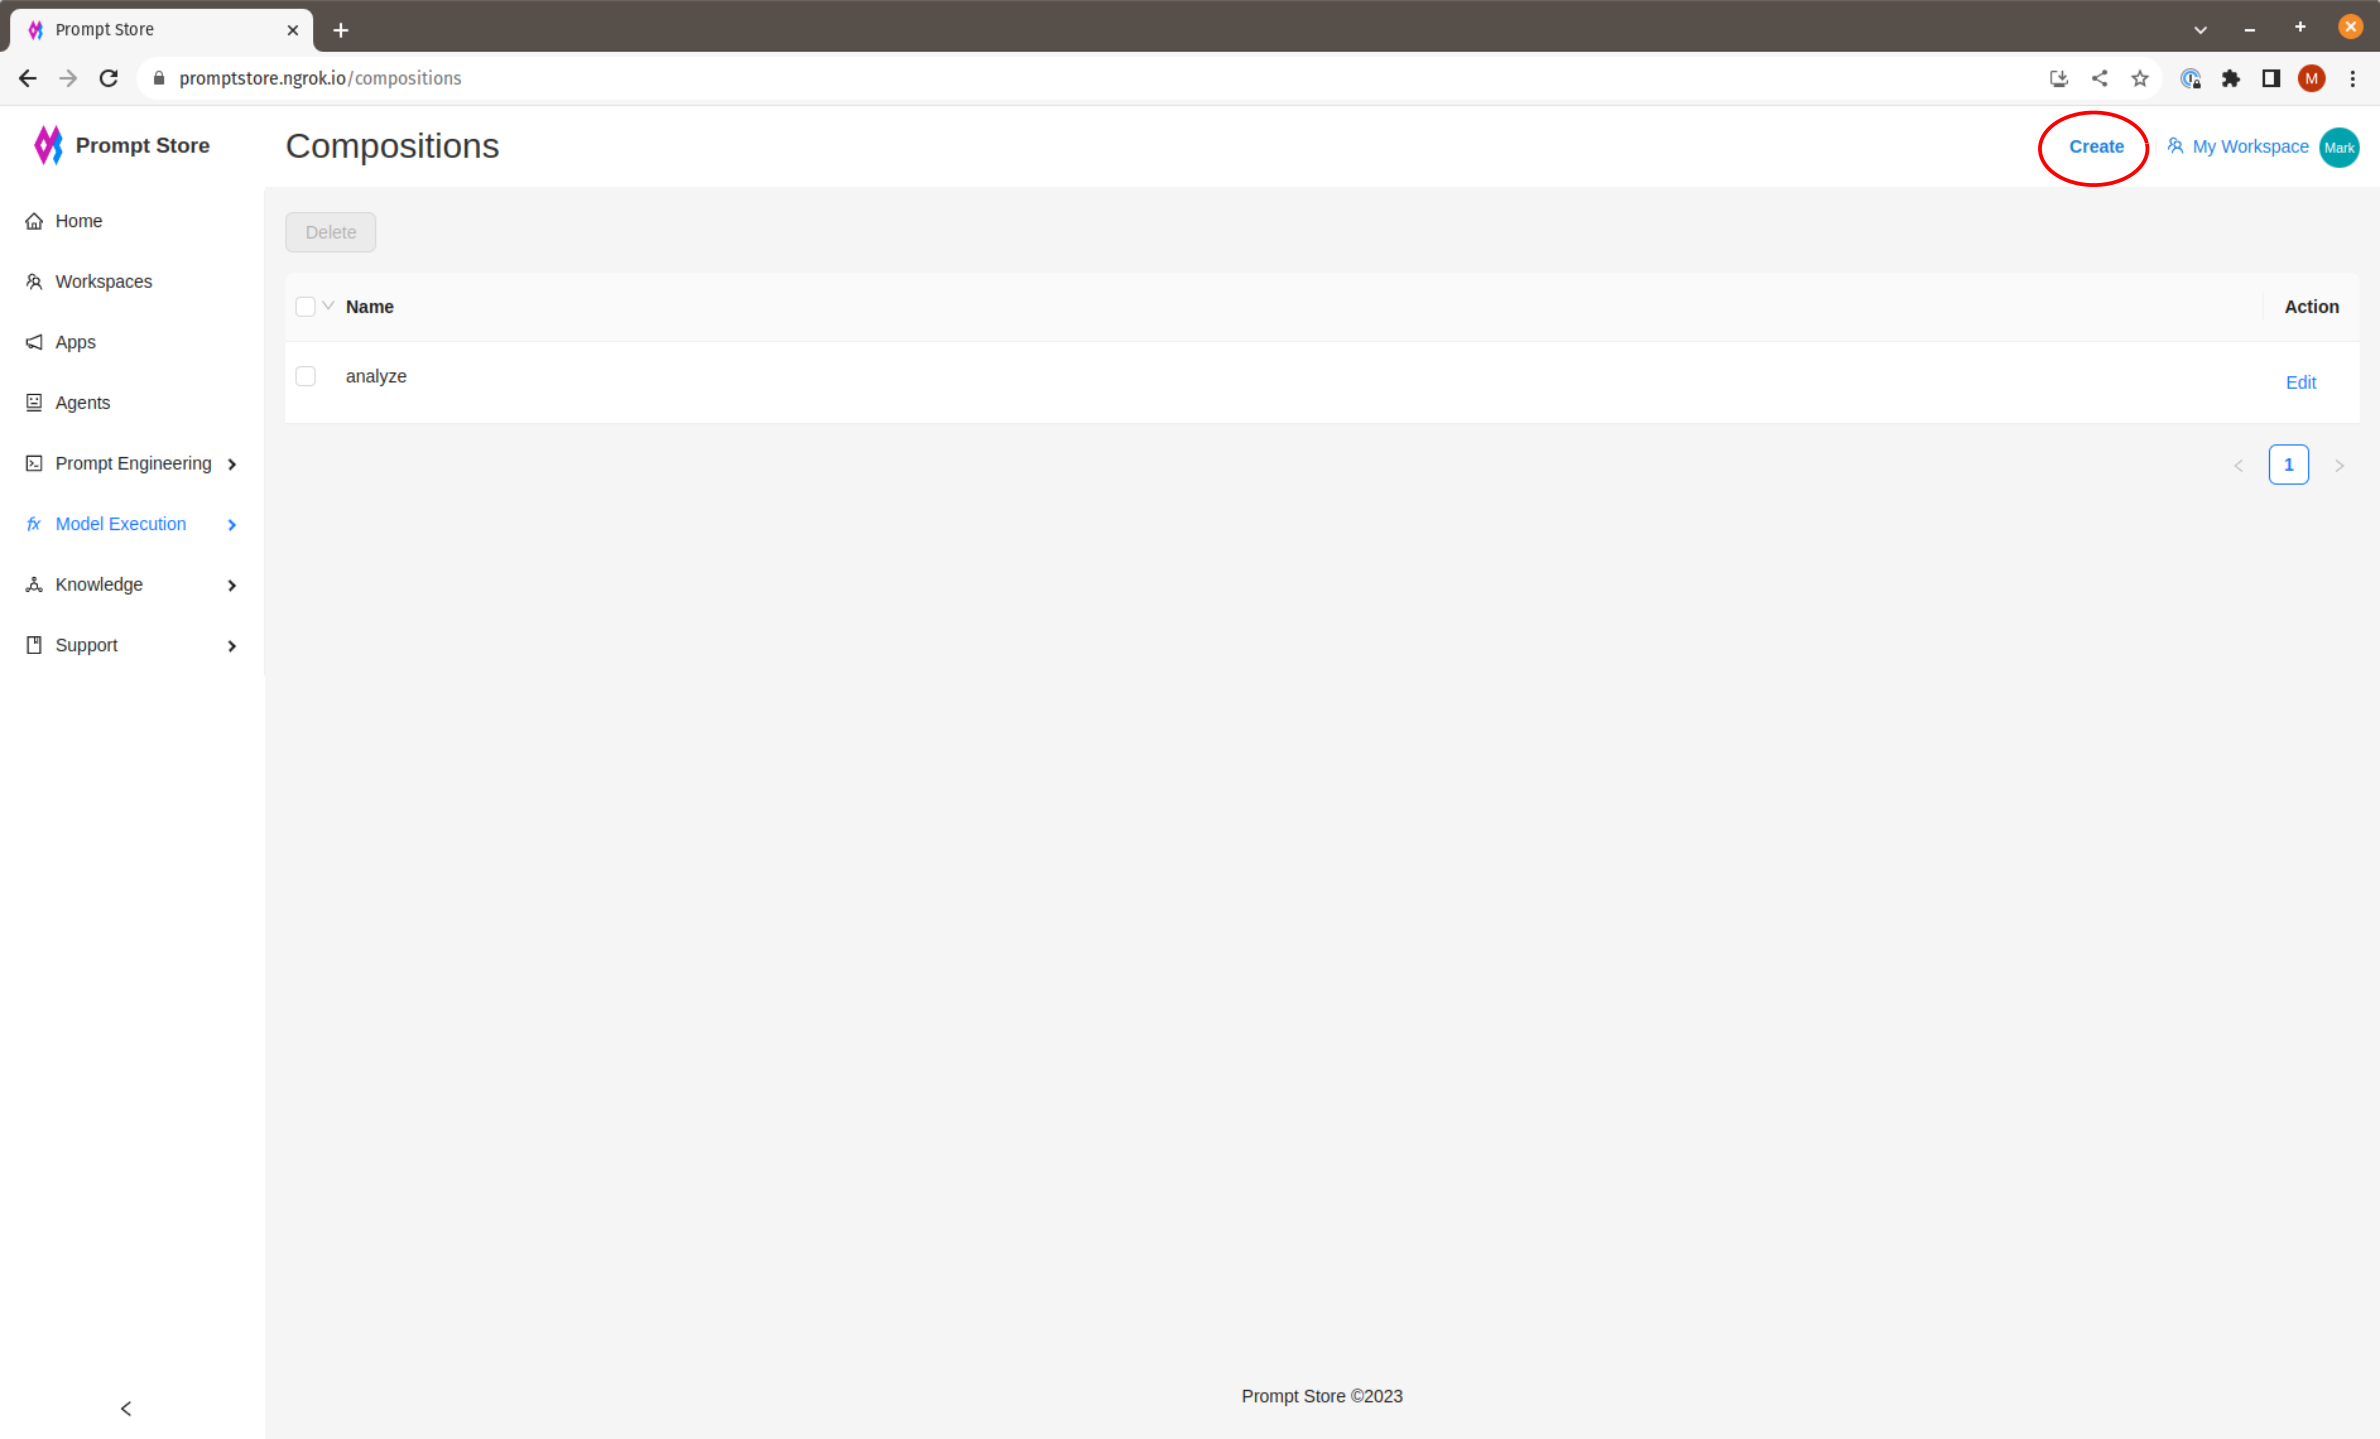
Click “Create” in the top Nav bar to create a new function.
Visual Components
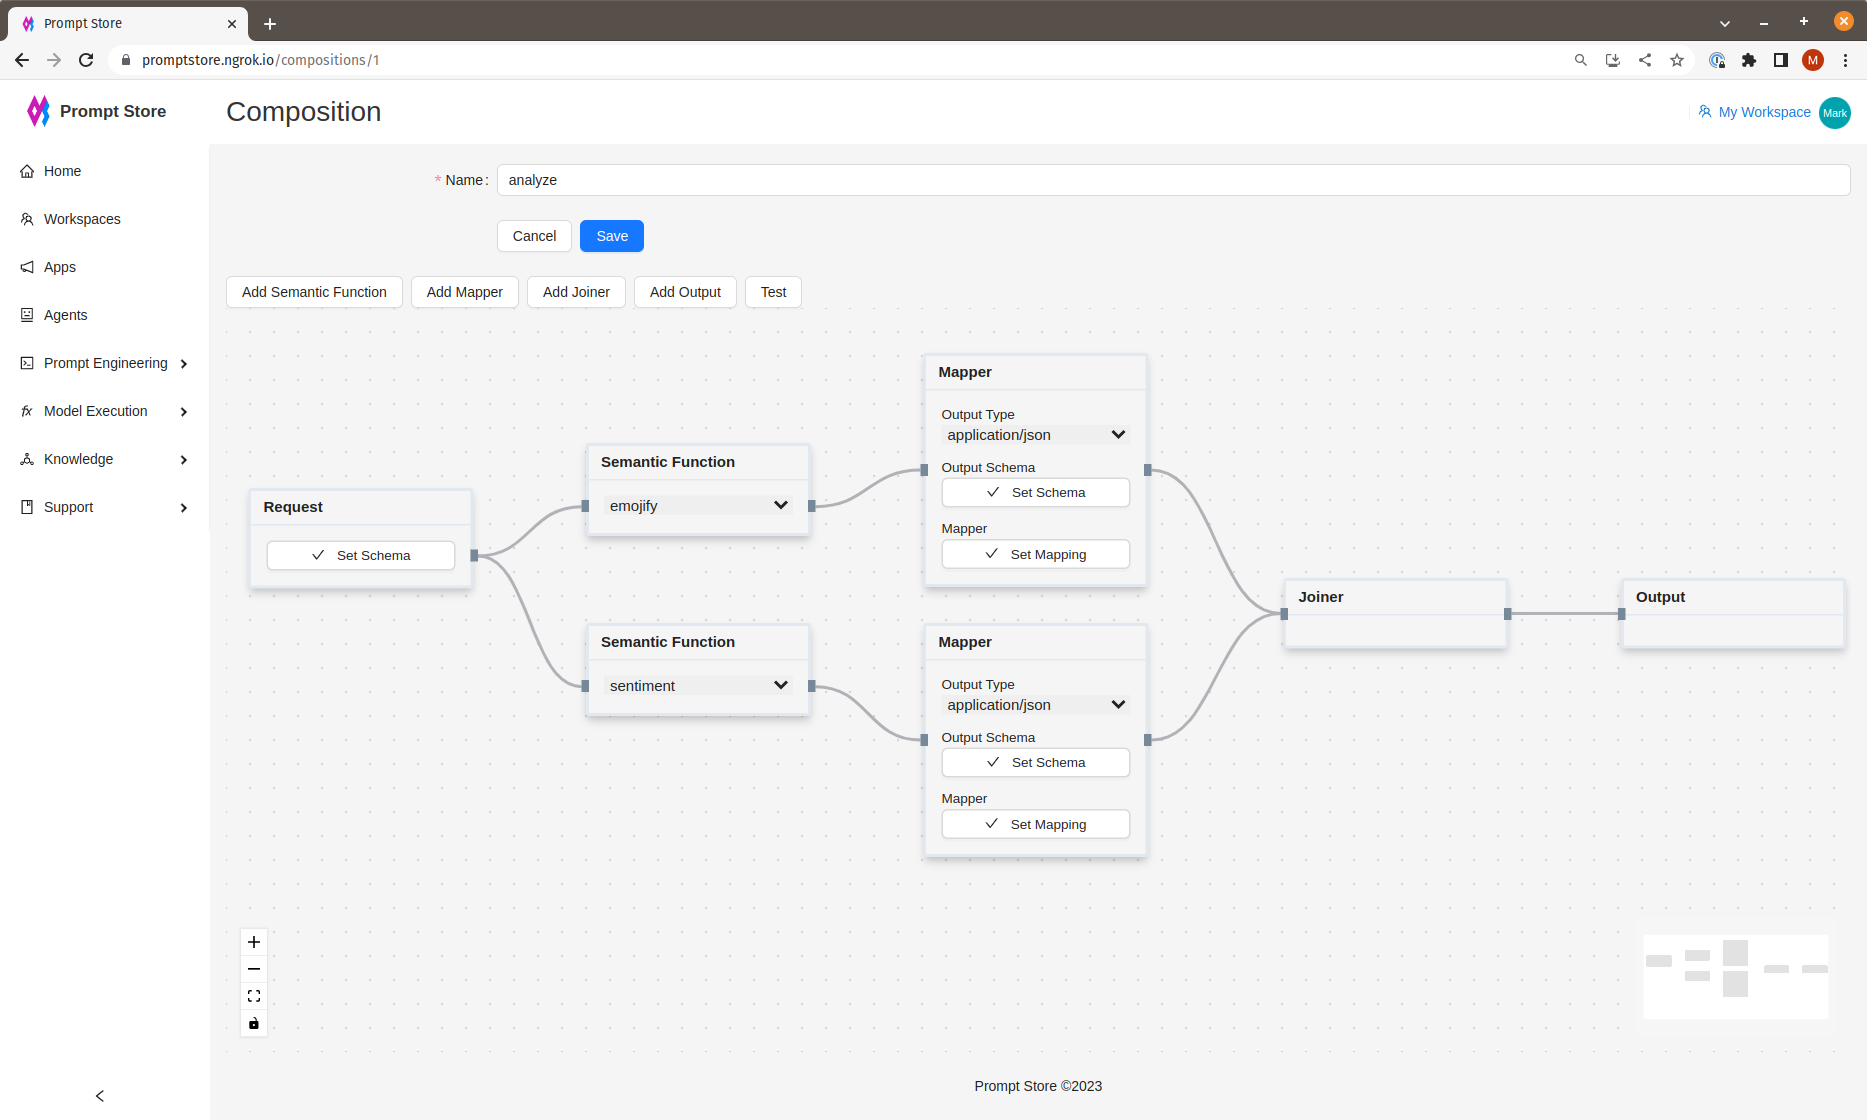
We can execute a higher order function just as we would a semantic function. However, multiple semantic functions will be called “under the hood” and chained together.
An example of a higher order function is an analysis function. In this function, also called
a “composition”, the request is forked into calling:
- An emotion analysis function
- A sentiment classification function
The results are joined together after mapping the specific model outputs to a standard schema.
The set of components to create a composition include:
- Request
- Every composition must start with a Request. A Request defines a schema. The schema is required.
- Semantic Function
- Selects an existing semantic function. The function schema, which is defined in the function, is expected to conform to the composition schema.
- Mapper
- Converts the output feeding into the mapper into a format suitable for the next component. See Data Mapping in Functions for more information.
- Joiner
- Merges the output of multiple components into a single response object.
- Output
- Every composition must end with an Output. The output is responsible for returning the result to the client.
To add a component to the canvas, click the relevant button. You can drag and drop components on the canvas.
To delete a component, select it, then press the “Delete” key.
To connect components, click and hold the output port of the source component (the mouse pointer cursor should change to cross hairs when the pointer is in position as it hovers over the port), and drag the pointer to the input port of the target component. If the mouse is released as it hovers over the target port, then a line should connect the two components.

The following controls are available to navigate the canvas:

The “Plus” and “Minus” buttons zoom out and in respectively.
The “Square” button automatically adjusts the zoom level to see the entire flow.
The “Lock” button toggles on and off interactivity, which when off, can make it easier to manipulate the canvas to view the flow without making changes in the process.
Finally, the “View Window” shows the section of the overall flow that is currently visible.

To display different sections of the flow, drag the View Window over the mini display.